Sales Productivity
Super-speed your Salesforce Edits with GridBuddy’s Mass Update and Mass Create
minute read

What’s worse than going into Salesforce at the end of the week with a notebook full of updates that you know will take hours? Unless it’s one of those lucky fields that I can update in a Lightning editable list, each update will require a click and a wait while the page loads before I can type in my notes and save. Repeat, repeat, repeat. Not so with GridBuddy mass update and mass create!
Sales Productivity Enhanced!
Let’s pretend you have 25 opportunity close dates you need to modify in Salesforce, 15 follow-up tasks to enter, and 40 forecast categories you need to change. Using traditional Salesforce, this would take a few painful hours to get done. With GridBuddy, you can get all of this work done with a handful of clicks and not a single page load.
(Don’t have GridBuddy yet? Check out how easy it is to get started!)
Mass Update
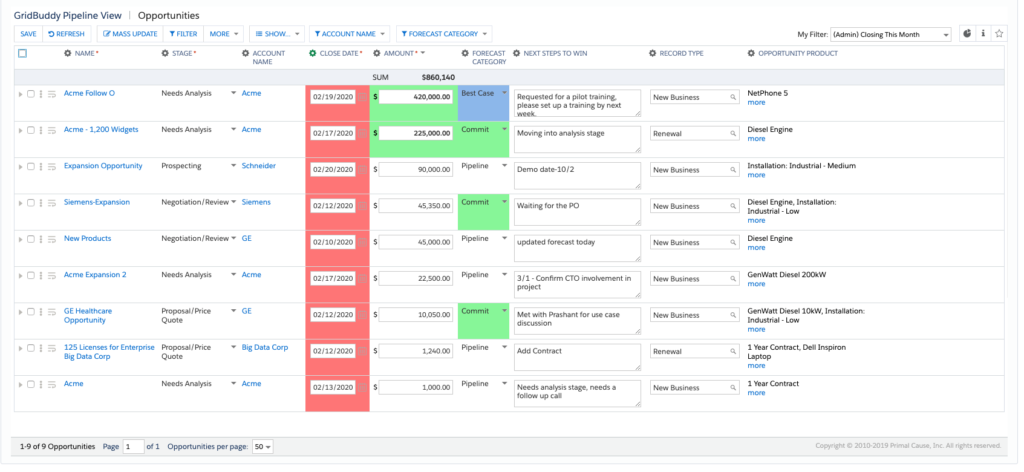
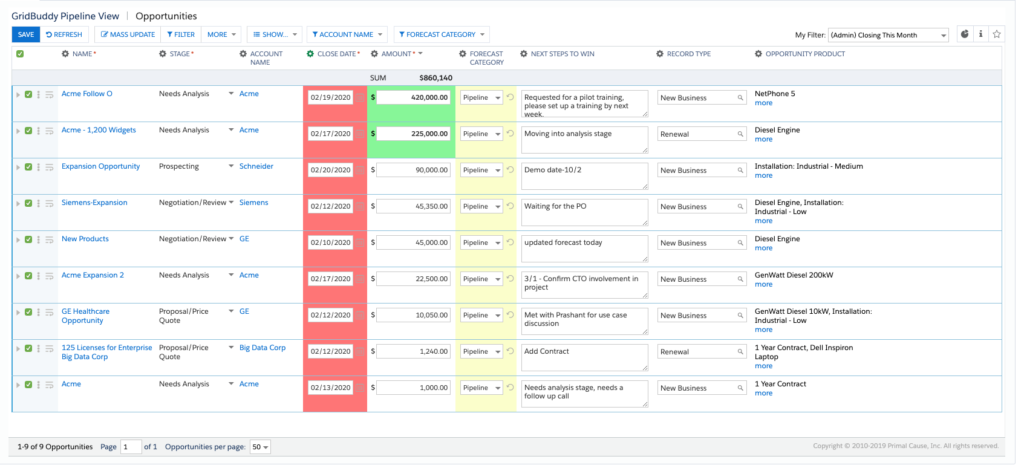
First, let’s update the close dates. If you have 25 opportunities that you thought would close this week, but which are clearly going to need more time, that’s the first thing to get updated. Open up an Opportunity grid and find the records that need updating. In this example, past close dates are conveniently highlighted in red so there’s no mistaking which records need to be updated.
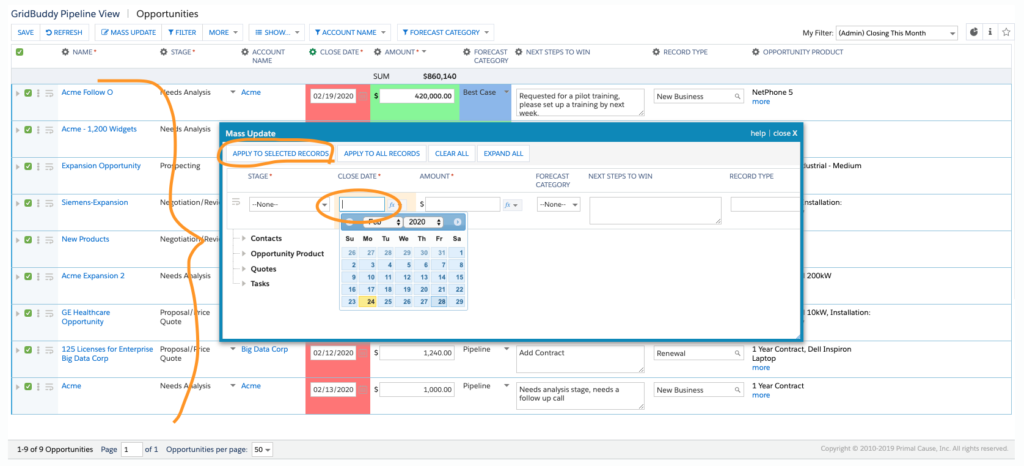
Check the box to the left of each record you want to update and click the “mass update” button. In the popup, select the new close date and click “update selected records”.
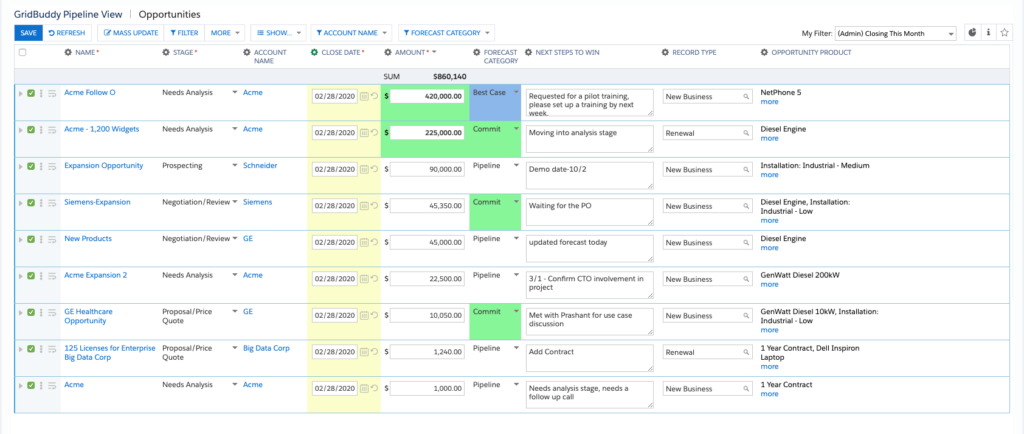
All the selected opportunities now show the updated close date. Save, and you’re done with the first of your updates.
Are you thinking that you could have updated close dates in a Lightning editable list? Well, you’re right. It’s one of the few fields you can edit in an editable list. Forecast category isn’t available in Lightning inline editing, nor is the amount field or “next steps to win”. For those, or any others that aren’t supported with LEX inline editing, the grid’s the way to go.
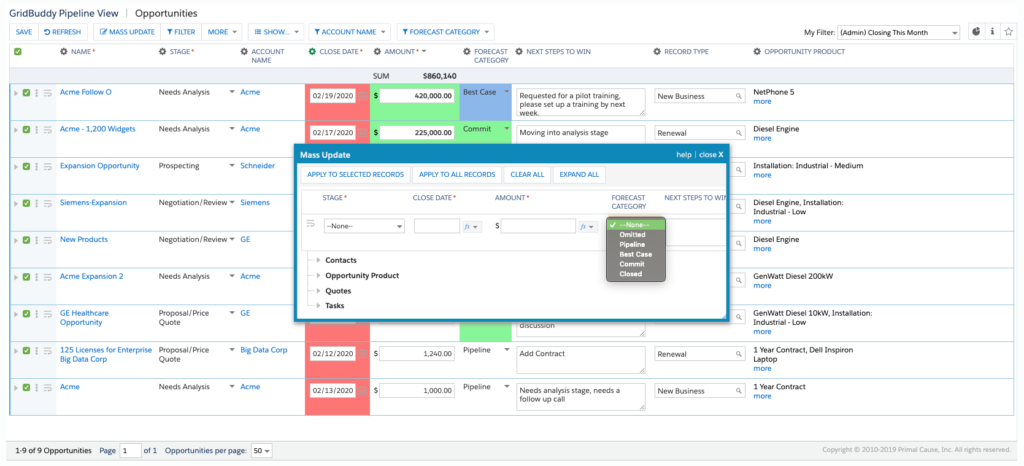
You can mass update your forecast category fields following the same steps as above: Select the records you want to update, click the “mass update” button, and select the forecast category you want. Click “apply to selected records”. In four clicks, you’re done.
Keep in mind that what you can do within a grid. You an create – or mass create – based on your profile or permission set. If you don’t have permission to create an opportunity record in Salesforce, you won’t be able to create one in a grid either.
Mass Create
Here’s one of GridBuddy’s unique features: Mass create. Let’s pretend you need to create a new task for all of the opportunity records in your grid. The task will be a reminder to call at the end of the week. Without the grid’s mass create functionality, you’d be doing these one-by-one, record by record.
Never again!
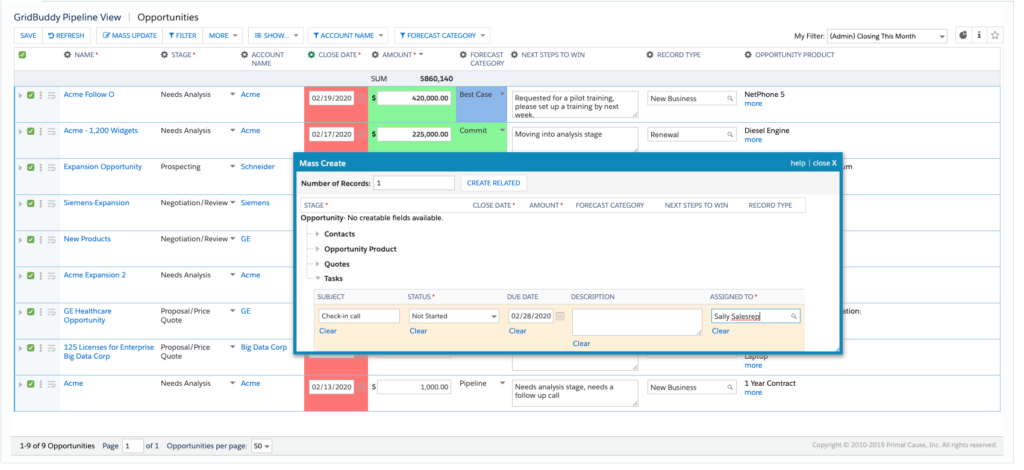
First, select the opportunity records that need tasks added. Click the “more” dropdown menu, then select “mass create”. Based on your permissions, you’ll either be able to create new parent records from here or not, as well as children records. We want to create a new “task” child record. The number “1” at the top means that you’ll create one new task for each selected record.
Click the arrow to open Tasks and enter the data that you want in each task. For example:
- Due date: Friday.
- Subject: Check-in call.
- Assigned to: Me.
- Status: Not started.
When the fields are populated, click the “create related” button and close the mass create popup window.
The grid looks unchanged… did it work?
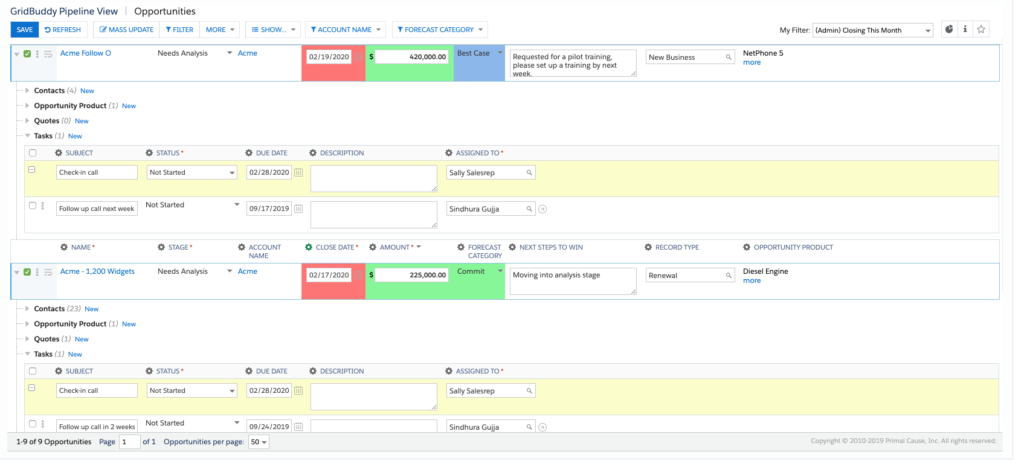
Kidding. Click the little arrow to the left of an opportunity record to see the new task you created. It’ll be highlighted in yellow, since you haven’t clicked the “save” button yet. (Remember that the grid doesn’t auto-save.)
Edit any of the new tasks to make them unique, if necessary, and save your grid.
Done!
Learn more about GridBuddy here, read a review from the AppAssessor on SalesforceBen.com, or contact us for a custom demo. We’d love to hear from you.
